Thursday, July 3, 2014

How to Make Your Sally Hansen Color Foils Look Perfect

...as possible.

If you follow the world of nail polish, you are sure to know that Sally Hansen has been busy with a few new collections, one of which is called Color Foils! A nod to the Chrome line from the early 2000's, these babies are infused with aluminum to make them as shiny and reflective as can be. (With that said, they are not Minx. Color Foils are pretty dang reflective, but you will not miraculously discover ten little mirrors on your fingers.) 

Although these polishes are indeed quite awesome, we do hit one little snag. Sally Hansen instructs not to use base or topcoat with Color Foils. On top of that, chrome polishes tend to show every little imperfection in your nails, like ridges, peelies, dents, and much, much, more-- possibly stuff you didn't even know you had. While some ladies out there are blessed with smooth nails, others are not, me being one of them. Sadly, Color Foils do not react well with ridge filling base coats, or any other type, as a matter of fact. I tried. The polish went all baldy and clumpy and draggy, and while you may be telling yourself (if you are nail expert) "Oh, I can avoid this, piece of cake," you won't be able to. Sorry to burst your bubble, but no matter how well you apply with however light a hand, you will not be able to make these work with a base coat alone. It's just not gonna happen. Instead of buffing my nails to the point where they're tissue paper-thin, I ventured out to find a way to hide my ridges and dents by still using a base coat. Be a rebel, guys, and read on.

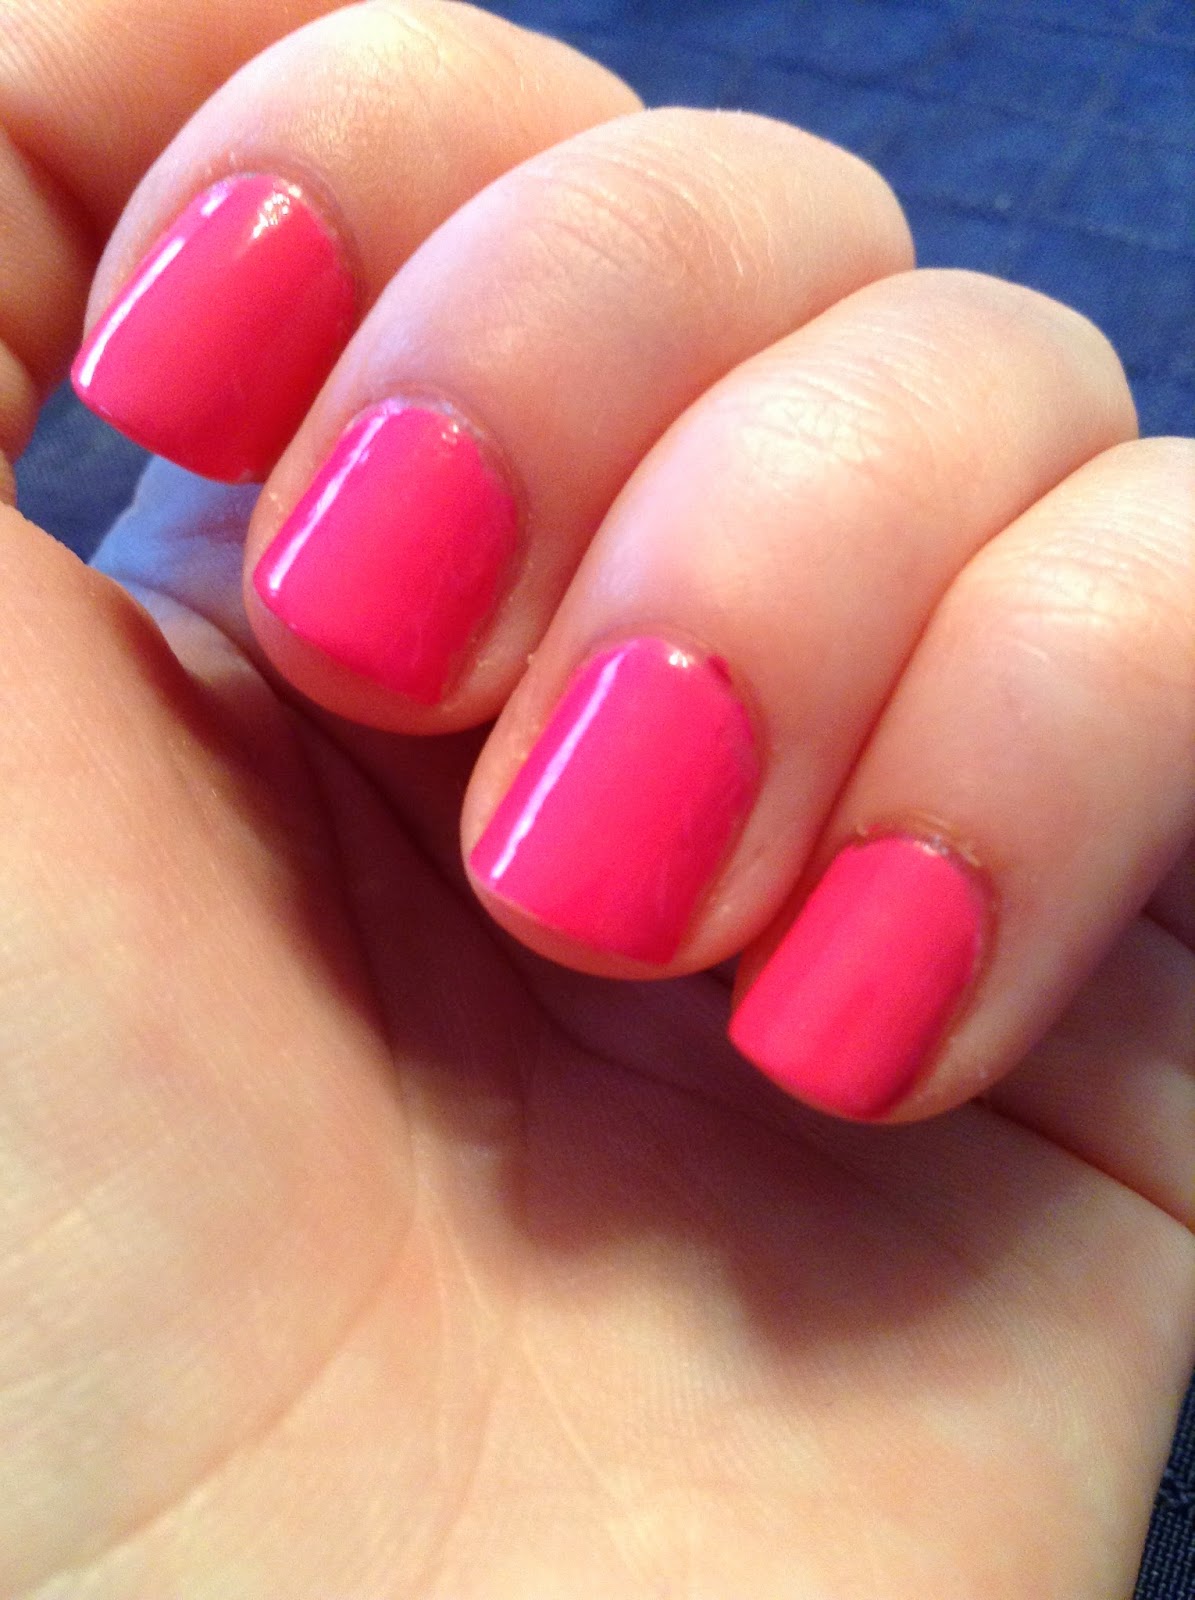
So here is what Titanium Flush looks like alone, without base or topcoat. Titanium Flush is hot pink chrome with fuchsia undertones.


You can see all of my ridges and dents, especially on my middle and pinkie fingers. Joy. 

I then removed it and tried it over my Essie First Base base coat. I can now confidently say that Color Foils look their worst over any sort of tacky base coat. It dragged and clumped and looked awful. Back to the drawing board!

I removed that and realized that my smoothest, driest coat of all would be of my topcoat, Essie Good to Go. I applied my two base coats, Sally Hansen Diamond Strength Hardener and Essie First Base, which together do a pretty got job of concealing my ridges. I then applied my topcoat. I waited until that was completely dry, and then painted two coats of the Color Foil. OH EM GEE!!! CHROMEY PERFECTION! 


I'm so sorry, but by the time I got to this combo I was pretty impatient, and I pretty much slapped it on and had no interest in cleaning up. I hope you can forgive me! :(

But seriously... How much of an improvement is that!? I experienced very little clumping and dragging, but my additional advice is to use a light hand and not press on the nail with the brush.

So to recap the layers are as follows:

1 coat Sally Hansen Diamond Strength Hardener
1 coat Essie First Base
1 coat Essie Good To Go
2 coats Titanium Flush

Or...

1 coat ridge filler
1 coat topcoat
2 coats Color Foil

I hope this helps your Color Foils look as AWESOME as possible! Good luck!

...............................................................................................................................................................

XOXO

Is


Sunday, June 8, 2014

How to Prevent Chipping Nail Polish

Possibly the most annoying thing for me in the world of nails is chipping polish. It's devastating to put so much effort into painting my nails and doing nail art, only to have it chip the next day, in which case I remove the whole thing and do somehting else. Granted, I don't mind this much, because I get bored with my polish pretty fast, but still. If I want something to stay, I want it to stay.

...Which brings me to the topic of preventing chipping. Let's review the possible causes of chipping.

Excess/Residual Oils-- Your nails naturally produce oils. If you apply hand lotion and cuticle oil you have those oils as well. It's important that they have oils to keep them hydrated, but these oils and nail polish are a bad combination. They prevent the polish from firmly adhering to your nails, which causes chipping. Be sure to swipe your nails with nail polish remover immediately before polishing to remove these oils. Some brands also make products to clean your nails, like the Formula X by Sephora Nail Cleanser.

"Water Damage"-- While washing your hands won't really penetrate the nail polish, submerging your nails in water (pools, baths, etc.) for extended amounts of time can be detrimental to the life of your mani. If your nails have some length past your finger, a "free edge," water can seep under the polish and cause your polish to chip. To create a barrier against water damage, always "wrap" your free edge. To do this, do one last swipe of polish along the free edge. You can choose to wrap using your color and top coat or just your top coat. See this post by All Lacquered Up for an in-depth how-to!

Inadequate Base and Top Coat-- Base and top coats are essential to a long-lasting manicure. A good base coat sticks the color to your nails while providing a nice surface for the polish to be applied on. I recommend Orly Bonder and Essie First Base, which both have rubberized elements in them to adhere the polish to your nails. A good top coat seals your polish, preventing wear and tear. I recommend Essie Good to Go and Essie No Chips Ahead to protect your mani.

I hope this post has educated you on chipping and has given you some good tips and products. If you have any questions or want to share your own tips, comment down below! 

..................................................................................................................................................

XOXO

Is

Friday, March 21, 2014

Manicure Tip: Don't Flood the Cuticle!

Hi guys! Today I'm just going to do a quickie post. Read on for a tip for when you're painting your nails!

Take a look at these two pictures of my manicures. Obviously, the colors are different, but what is the other main difference?

Essie Mint Candy Apple (Matte)
Essie Mod Square
You got it! The application! Notice that on the first mani the color goes alllllllll the way back, flooding the cuticle... Not very attractive. In the second mani, the polish doesn't go that far back. It leaves a tiny, tiny space, just before the cuticle.

Notice what a difference stopping before you paint your WHOLE nail makes! With a little more precision and care, you can achieve a look that is professional, rather than one that screams "I'm an amateur just slopping polish onto my nails!"

So! The next time you paint your nails, be careful to stop just short of your cuticle! It makes a huge difference and you'll be a lot happier with the result.

That's all for this post! See you next time!

....................................................................................

XOXO

Is