Wednesday, March 11, 2015

Sinful Colors Folly

Hi guys! Today I have a quick swatch for you, a few different ways. 


Sinful Colors Folly is a reddish pink creme. It is perfectly opaque in two coats. The formula is a little thick, but that makes it easy to control.


Topped with Essie Pure Pearlfection. Ooh! Nice and shimmery.


Folly+Pure Pearlfection mattified. Eh. Kinda takes the life out of it.

Have you tried any Sinful Colors cremes? Tell me what you think! What's your favorite?

XOXO

Is


Tuesday, February 3, 2015

Nails Niche Peeks: Glitter Gradient

Glitter gradients are some of my favorite looks. They are so versatile and you can change up the colors and glitter until you're happy... There are endless combinations!


For this mani I used Essie Go Overboard, a dark green-toned teal (OCW!) and the glitter is Essie Set in Stones, a silver hex glitter (it looks a bit gold in this picture... Sorry about that!). 

What's your go-to simple nail art look? 

XOXO

Is

Sunday, January 11, 2015

Chrome Geometric Negative Space Nail Art

Hello ladies! How's your 2015 going? I hope it's a happy healthy one filled with lots of achievements and blessings. 

Today's nail art is a really cool design, in my opinion. I tend to do intricate nail art on the weekends, since that's when I have time to relax. 


I was inspired by this manicure that I saw on Pinterest: http://pinterest.com/pin/312366924127751652/

For this manicure I started with a base coat and a layer of topcoat, then added two coats of Sally Hansen Color Foil in Titanium Flush, a pink mirror-like chrome. These polishes are pretty finicky, so be sure to see my post on How to Make Your Sally Hansen Color Foils Look Perfect: http://nailsniche.blogspot.com/2014/07/how-to-make-your-sally-hansen-color.html 

Once that was dry, I took a nail art brush and Essie Spin the Bottle, a creamy nude, and free handed a thick horizontal line in the center of my nail. After that, I used Sinful Colors Black on Black to make the outline of the nude stripe and the zig zags. I finished off with topcoat.

I initially was going to use tape over my bare nail and add Titanium Flush, but because of the quick-drying nature of the Color Foil I just couldn't get a clean line, so I substituted the negative space bare nail look with a nude polish and a tiny brush. 

I really liked this look. The geometric strip across the center combined with the reflective metal finish was really cool. I went to get a pedicure after I did this and I got so many compliments from the ladies who work there! 

What's your favorite nail art look to do when you have time? Have a great day!

XOXO

Is

Wednesday, December 17, 2014

Edgy Negative Space Nail Art

Hi guys! Today I have some nail art to share with you.

Negative space has been a big trend lately. I personally am a huge fan!


Here it is! I really enjoyed wearing this- I wore it for two whole days, a rarity for me!


First I used my base coat (CND Stickey) and let it dry completely. If you have stained or discoloration, you may want to use a ridge filling base coat or a sheer pink polish, but be sure to let it dry fully before moving on to the next step. Using Scotch tape, I cut of the jagged edges on one end and then positioned it at the base of my nail in a triangle shape and then user Sinful Colors Black on Black to fill in the exposed area. Then I immediately removed the tape.


Next, I used a striping brush dipped into Essie No Place Like Chrome and made two intersecting lines, each parallel to the edges of the bare triangle. (Geometry, guys. Yes.) 


I finished off with topcoat (Essie Good to Go) and added a silver Sally Hansen I Heart Nail Art rhinestone. 


What do you guys think? I really like negative space nail art. You can really do a lot with it! How bout you guys! Do you like negative space nail art?

XOXO

Is


Sunday, November 23, 2014

Fall Floral Nails (elleandish // Janelle Fall Floral Nails recreation)

Hey there! Today I have some fall floral nails to share with you.

This look was inspired by the talented Janelle, the nail artist behind her channel, elleandish // Janelle. I absolutely adore her channel and videos. Every tutorial is meticulously edited--and it shows! Her voiceovers are so calm and chill. Her designs are really cute and fairly easy to do. She's also a terrific teacher and super easy to understand. Really, guys, you should check her out because her videos are the best I've ever seen! One of her videos is a tutorial for fall floral nails, and I decided to try it out. Here is a link for the video: http://youtu.be/tsL1dvKSLj4


I have done floral nails before, and while there are many ways to create flowers on the nails, my favorite way to obtain abstract roses is Janelle's way, which I'll describe in a moment.

(Keep in mind that the instructions I'm giving you are all from Janelle's tutorial, and they're not my own--I simply switched the colors a bit.)

I started off by painting my thumb, pointer, and pinkie nails with a dark green polish. I used Sinful Colors Last Chance, a dark forest green crelly that doesn't creep into the black territory like most dark greens. It's a gorgeous color-- a must if you like green polishes! Beware, this color MAJORLY stains, so I would use two coats of base coat and steer clear of your cuticles! I think I did two or three coats.

I painted my middle and ring fingernails with Sinful Colors Beaches and Cream, a cream color with shimmer that doesn't show up on the nail, but gives it depth. I did three coats because it was a bit streaky.

Then, using Essie Big Spender (a berry-magenta) and Essie Tart Deco (a very orange-toned coral) I made big spots of color on my middle and ring nails using the brush. 

Then, I dipped a toothpick into the cream colored polish and swirled it with the dots to make roses. 

After that, I dipped another toothpick into the dark green and dabbed it onto the nail to make easy leaves. I learned this technique from videos by Cutepolish!

I finished with Essie Good to Go topcoat. 

I really love florals! Do you? Comment down below! See you soon!

XOXO

Is

Saturday, November 22, 2014

Be There or Be Square!

In this case it's "be there or be round..."

Say hello!


The great debut of my Roundies. (Wearing OPI Bubble Bath with Wet n Wild's matte topcoat and two Sally Hansen I Heart Nail Art studs.) I enjoy this; yes I do. Subtly chic and trendy.

I broke a corner the other day, and Marta of Chit Chat Nails rounded off her nails too, so it seemed like a good time.

A comparison:


OPI Yodel Me on my Cell on my viciously angular square nails. 

And now for some round spam!


Essie Style Cartel topped with OPI Comet in the Sky. Like a galaxy! Ooh... Ahh...


Sinful Colors Cream Pink. Most certainly not a cream... It's a hot pink with warm undertones and subtle gold shimmer in direct light. Girly!


OPI Do You Have This Color in Stock-holm with an accent of Funky Fingers Sand and Stilettos. I loved this mani!

So there you go! Be there or be square, guys... Except my Roundies are no longer here, lol. I kinda didn't like them after a few days and switched to squoval by squaring off the tips. Ah, there's nothing like the indecisiveness of a nail junkie...

Until next time! What is your favorite nail shape?

XOXO

Is

Wednesday, August 27, 2014

Chains Nail Art

Today I have a really edgy mani to show you. Combining matte black, silver, and chains creates a great punk look. Check it out:


I started with a base of Spoiled Visually Slimming and added a coat of Essie Matte About You. (Which I've spotted in CVS; it's about time it started going retail. Woo-hoo!) I then used a thin brush to paint silver chains zigzagging across my nails, so each chain kind of flowed into the next, making it a little more seamless. I used Essie No Place Like Chrome for the chains. I did not use topcoat for this mani. The contrast between the matte black and the metallic silver is so striking, I think, and the fact that the chains are kind of messy makes it so much more edgy.

What do you think of this mani? 

...............................................................................................................................................................

XOXO

Is


Saturday, July 26, 2014

Essie Sparkle On Top Swatch and Review

Hola, chicas. Today I have a swatch of an Essie Luxeffects polish for you. It's fairly new; from the most recent sub-(?)collection of Luxeffects released in winter 2013. It's called Sparkle On Top.

This polish is a bit of a shard glitter/flakies hybrid, a little softer and denser than shard glitter, but sharper than flakies. This creates a sort of iced look, almost as if your nails were frosted with ice. Try layering it over brighter shades for a summer mani to keep your nails looking cool like an iced beverage; or layer it over darker shades for a look that puts winter frost on grass to shame. 

Formula wise, this polish is easily spreadable across the nail using a medium-thick coat, but the polish is indeed a bit thick. It covers perfectly in one coat. The base look of it is kind of like sharper flakies, but some larger shards may end up on the nail too. They have a cool-toned sheen, so this polish would probably look better over cooler-toned polishes.

Here it is over Essie Mod Square, an example of an awesome summer look. Mod Square has an even balance of warm and cool undertones, so it worked nicely.


And here it is over OPI Ogre the Top for a wintry mani. You can see that the blue-green reflections in Sparkle On Top go nicely with the cyan base.


That's all for today, chicas. Hope you enjoyed!

...............................................................................................................................................................

XOXO

Is


Saturday, June 28, 2014

Essie Apricot Cuticle Oil Review

So today I'm changing things up a bit and doing a review on one of my favorite nail care products: Essie's Apricot Cuticle Oil.

This comes in a classic bottle like the ones Essie polishes come in. It has the same skinny brush, too. 


I started using this product a few months ago. Now, I haven't tried many cuticle products. The two I've tried are the two I like, this one and Burt's Bees Lemon Butter Cuticle Cream, so I am not an expert on cuticle products, but I really do like this one.

This oil is available wherever Essie products are sold. It is usually displayed along with base and topcoats.

This oil is a good consistency, not too thin or thick. 

It's light and absorbs fairly quickly, but still leaves a slight shine.

 It has a light apricot scent that is fragrant but not too strong. It's actually pretty scrumptious!

It softens your cuticles so they're easier to push back.

It's fairly easy to apply, but because of the structure of the bottle you will essentially only be able to apply it easily where you can apply polish easily. If you can sit on your bed with a polish bottle in your hand and paint your nails, you will most likely be able to do the same with this cuticle oil. However, if you're like me and need and flat surface to do your nails on, you'll need to apply this oil on a table or something of that nature. In other words, I don't recommend this oil for travel. For this reason, I kind of wish it came in a tube or something so you could take it on the go. 

The thing I like most about this oil is that it gives your cutes a clean, polished look in seconds! However, I find that, while it does moisturize your cuticles, the moisture it gives doesn't last as long as other products I've tried. 

Overall Rating:
8 1/2 out of 10. I really like this product and I feel that you do get a lot of oil for your money's worth. However, I docked a half a point for the lack of portability and a point for not providing long lasting moisture. That being said, I do recommend this product. It's the first cuticle moisturizer I tried, and you can see the difference it made in these pictures below. However, I would not recommend this product for "fixing" your cuticles if they're very damaged. Granted, that is what I used it for, but it took a pretty long time to get them in an acceptable state... like, a few months. Rather than using this oil to fix your cutes, you may want to use this oil to maintain them.

          
Here is a picture before I started using the cuticle oil. You can see the hangnail on the left side of my thumb and the raw area on the right with some dryness mixed in all around. Sigh... Not pretty.
Here is a picture taken today, about four months later. 

Before

After


I hope this review has helped you! Good luck in all of your nail care ventures!

..................................................................................................................................................

XOXO

Is


Monday, June 9, 2014

Some Recent NOTD's

Greetings, nail lovers! I have A LOT of catching up to do with my NOTD's, so I guess now's the time! Some of them are recreations of various YouTubers' or bloggers' designs, in which case I will link to their post. Oh, and one more thing! I've been doing my lovely friend's nails recently, so some of these mani's are hers.


Here we have a lace half moon mani. This is a sort of recreation of Lucy's Stash's Lace Half Moon Manicure, one of several that she's done. I used Spoiled Correction Tape to paint the white base. I waited for it to completely dry, then applied reinforcement stickers to the "half moon" area and painted over it with Sinful Colors Cream Pink, a squishy neon pink with gold shimmer, and peeled off the reinforcements, revealing a white half moon. I waited for THAT to dry, and then used a black Hot Designs nail art pen to make a smaller half moon inside the white one and then black dots at the edge of the white half moon, and then connected the small black half moon to the black dots with black lines. Wheeee!


Here is just a simple mani with an floral accent nail. This are the gorgeous nails of my very dear friend, who I am currently getting addicted to nails. The hot pink is Essie Mod Square, which you can find a review of here. The accent nail is Essie Fiji, with flowers made with a dotting tool. The blue is Essie In The Cab-ana and the silver centers are Essie No Place Like Chrome. This mani definitely shows that I LOVE Essie!


This mani is based on the Chit Chat Nails' technique called a Skittlette, which she describes here. I like this idea a lot! However, I didn't quite like the result. Originally I had made the my pinkie completely covered in pink glitter, but I didn't like the look of that, so I took it off and changed it up. I started with a black base (Spoiled Visually Slimming). I then used a tiny paint brush to paint small swirls on the middle and ring fingers with Essie Mod Square and then went over the swirls with Essie A Cut Above. I finished with a matte top coat and then added a faux rhinestone with A Cut Above at the base of the nails. Done!


This is a nice mani, cute and sweet. It is a recreation of cutepolish's Pearls and Pastel nails, which I really liked! I painted the bottom half of my nails with Sally Hansen Lacey Lilac. I then added white stripes to the purple with Spoiled Correction Tape with a tiny brush and used a dotting tool to add white dots where the purple met the naked nail. I added OPI Happy Anniversary! to the white dots to imitate the nail art pearls (which I don't have). I finished with top coat, and then added a matte top coat to the polish! Pretty!


Here are my awesome friend's nails again! This is a simply triangle look. I started with Sally Hansen Pixie Slicks, a nice bright pink. I then blocked off a triangle with Scotch Tape at the tip of the nail with Spoiled Paying With Platinum, an interesting duochrome. It's grayish with flashes of purple, and at extreme angles, green. It went well with the pink... I like green and pink and purple together!


This is a recreation of a look from a video by MissJenFABULOUS, a YouTuber. I started with Essie In The Cab-ana on my thumb, pointer, and pinkie fingers and Sally Hansen Pixie Slicks on my middle and ring fingers. I stroked In The Cab-ana down the middle of my middle and pointer fingers and then, with a tiny paintbrush, I flicked white (Spoiled Correction Tape) and the pink over the blue. On my 
thumb, pointer, and pinkie fingers, I made a large dot of pink at the base of my nail and a smaller pink dot above it, and smaller white dots inside the pink dots. Voila!


This was a rainbow dotticure. I used (in ROY G. BIV order) Essie Mod Square, Essie Really Red, Sally Hansen Sun Kissed, some non-brand random yellow ice cream shaped polish, Spoiled I'm So Jaded, Sally Hansen Blue Me Away, and OPI Funky Dunkey. I made rows of dots with a dotting tool. I wore it like that, then a few days later added Maybelline Clearly Spotted on top. It looked sort of ombre this way!


Now we have watermelon nails, again on my BFF. I started with Sally Hansen Coral Reef for the watermelon color, and then with the Kelly Green polish from the Hot Designs nail art pen I made a green French tip. I added a white line with the white Hot Designs pen in between the green and coral. Then, with the black pen, I added three seeds on the coral.


Last (and kind of least), we have a jelly sandwich. The polish I used was a bit too opaque, but oh well. I started with two coats of Orly Sky Blue Color Flip, a blue polish with a lavender and sometimes sea foam green sheen. I added a coat of Essie Set In Stones, a silver hex glitter, and then another coat of Orly. It turned out to be a bit thick, but it was a really nice mermaid-y look.

Whew! Well, that's it! I'm all caught up. I hope you enjoyed, and maybe it gave you some inspiration! If you decide to recreate something, please show me in the comments down below! See ya!

..........................................................................................................................................................

XOXO

Is

Sunday, May 18, 2014

Essie Ballet Slippers Transformed!

Hi y'all! I've had a lot of posts in the past couple days because I've been playing catch up. One can only have so many mani pics on their camera roll to be posted. 

Ah, one of my favorite brands... Essie. Essie is famous for having feminine, sheer, barely-there, yet classy colors. They have only started introducing neon and metallic collections, among other loud polishes, in recent years.

What I'm going to be sharing with you today is one of Essie's most popular shades: Ballet Slippers. This is also one of the brand's oldest shades. Essie Weingarten, the head of the company, used to take ballet as a little girl, and created this color in honor of that.

Ballet Slippers is a semi-sheer pale pink. It's an excellent base for a French manicure, as well as being pretty alone for a conservative mani. It's also work appropriate. I like to use it for more professional occasions. When I'm a bit tired of bold colors and nail art, I reach for Ballet Slippers.


And here it is! However, being me, I couldn't just let it be. I'm not the type to go about with a quiet color like this, so I slapped some of Essie's Pure Pearlfection on top, a favorite of mine to add some pizazz to a traditional color. 

Do you like it? Love it? What's your go-to "quiet" polish, and how do you transform it?

…………………………………………….………………………….……………………………………

XOXO

Is

Saturday, April 26, 2014

NOTD: Diagonal Nail Art

Hi guys! Today I have a NOTD to share with you.

This is the mani! I'll give a little how-to on it now. First, I applied my base coats (I use two for my needs, Sally Hansen Diamond Strength Hardener and Essie Grow Stronger) and let them dry COMPLETELY. Like, for two to three hours. However, if you don't have a lot of time or are impatient, skip the base coat. Next, I taped off the section of my nails that appears bare in the picture above with Scotch tape. I then painted the open section of my nail with Sally Hansen Sun Kissed (the orange polish) and removed the tape immediately. I let that dry COMPLETELY (like one hour) before moving on to the next step. I then taped off the bare section of my nails again, but this time I INCLUDED a small stripe of orange under the tape. Then, I used Essie In the Cab-ana and painted the open section and removed the tape immediately. I let that dry for a little while and then used my dotting tool to add small white polka dots to the orange stripe, to add some pizazz. I finished with Essie's Good To Go topcoat, and voila!


This is a nice mani to sport if you want to use two contrasting colors. Some cool color combos would be green and pink, yellow and purple, coral and mint, etc., which are all opposites on the color wheel. 
But experiment and be creative!

Like I said before, part of the reason why I was so excited to do this mani for the first time in months was because it was one of my first nail arts! So now I'll show you the picture of that first mani, the humble beginning. Brace yourself, because admittedly my nails are cuticles weren't in great shape. I was a nail-biter for years, and the cutes weren't in great shape either. So here it is!


Yup. That was months ago, way back when I had no base or top coat, no cuticle oil, and hadn't completely beat the habit yet. But I have a soft spot for this mani, and I did an awesome job for this first attempt, I must say.

This is in of the reasons why I like taking pictures of my manicures. I see all of the colors and designs I liked and executed, but I also see how I have improved.

So that's it for this post! I hope it has inspired you to recreate one of these manis.

What was your first attempt at a nail design, and how'd it go over?

..........................................................……………………………………………….……

XOXO

Is

Thursday, April 17, 2014

French Manicure Tutorial

Hey, all you nail lovers! I have a manicure to share with you today that I'm SO proud of. Believe it or not, I attempted my first ever French manicure today!


I'm really excited! It turned out great. It adds such an elegant yet simple look to my nails. And it was pretty easy!
First, let's go over the basics. If you don't know, a classic French manicure consists of two things. The first thing is a base color. This color is typically a nude or pinkish color, and most of the time it's sheer. Essie has a great selection when it comes to French mani base colors. Check them out here. The second element of a French manicure, which is generally how you can tell that it's a French, is a swipe of white at the tip of the nail. Any white will work, but if you want to stick with Essie, try Blanc or Marshmallow. Blanc is a basic white; Marshmallow is sheerer and not as white-out-white as a regular white. (Wow, let's say "white" one more time.) 


Basically, a French manicure is meant to look au natural; like your nails, but more polished and perfect. 

So let's jump right in to the tutorial.


Sorry, I didn't take pictures because I didn't figure I would make a tutorial. :) But you'll probably be able to understand. If you don't, leave me a comment!

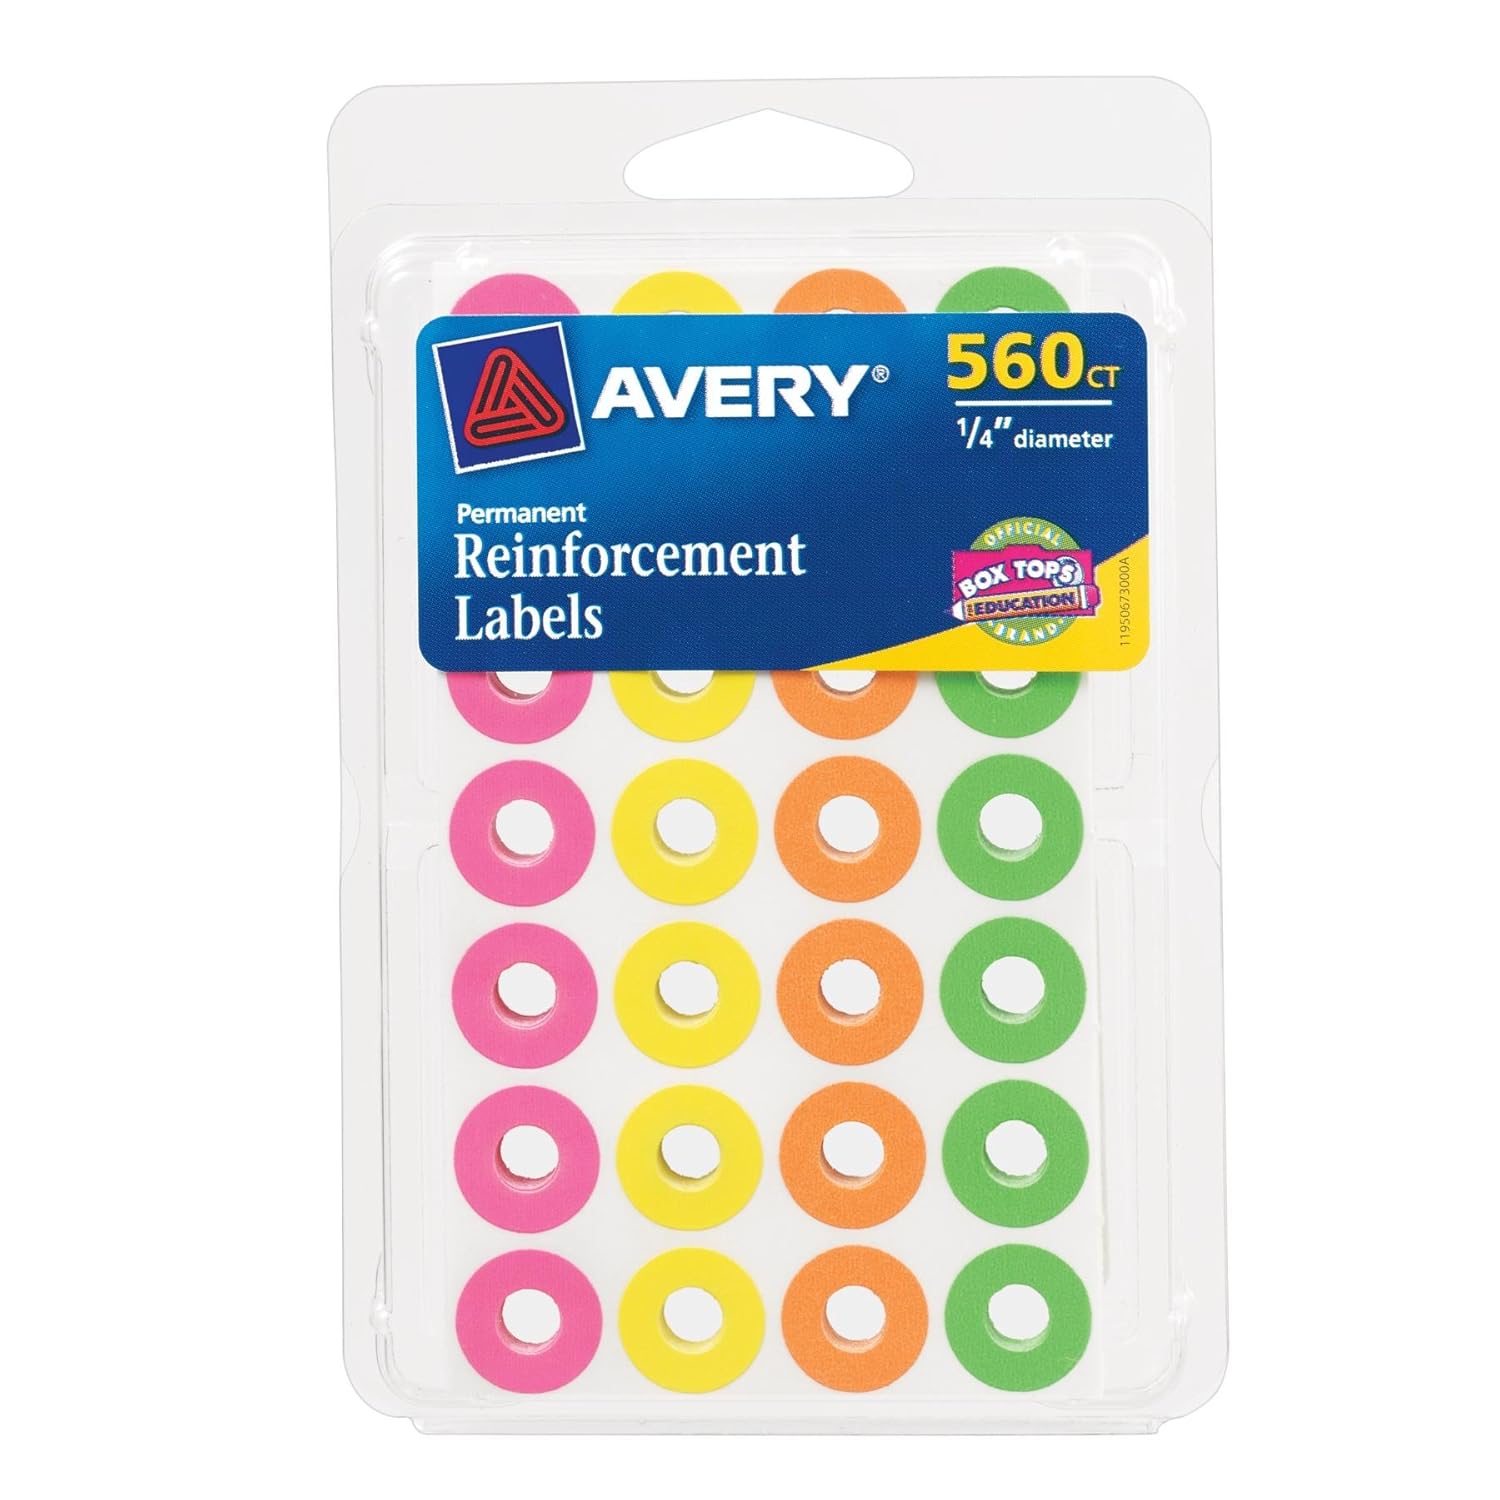
You will need: a base coat, a base color, a white polish (preferably pretty opaque in one coat), and a top coat. (Note: this is for just the polish. If you are giving yourself a full on manicure, you will also need whatever other materials you usually use. I use CeraVe hand cream, Essie's Apricot Cuticle Oil, a Q-tip dipped in cuticle oil to push back my cuticles, a nail clipper, and a glass nail file.) Also, for this particular method that I'm sharing with you today, you ABSOLUTELY NEED reinforcement labels. You know, the little stickers that you use to repair a ripped hole in a hole-punched papers that you put in a binder. Ugh, is it just me or do your papers rip out of your binders ALL THE TIME? You'll see why you need these soon. This is what they look like, and you can find them at any office supply store, like Staples. 


They come in clear (plastic) or white (although I do own some neons like the ones pictured above). For this mani, all I could find in my house were the clear ones, but I would recommend using white or colored ones. It will be easier (once again, you'll see why in a moment). Now, let's get started.

First, give yourself a manicure, if you like! This will enhance the French mani experience. :) This is my routine: First, I remove any existed polish on my nails. Then, I cut and shape my nails with a clipper and a glass file. However, for this manicure longer nails are best, so only clip your nails if you need to, and if you do, leave some length. Also, this French mani technique works on round and square nail shapes, so either is fine. Mine are pretty square, for the most part. Next, I soak my nails in a bowl of warm water for about 3-5 minutes, or until the water cools down. After that, I dry my hands and apply a moisturizing hand lotion and cuticle oil. I then push back my cuticles. Here's a little tip: If you do not have a cuticle pusher or an orange stick, like me, use a Q-tip dipped in either your leftover water that you soaked your nails in or a little cuticle oil to soften the tip. Once that's done, I use nail polish remover and swipe some over my nails to remove them of any oils. Admittedly, I was skeptical of this when I saw the ladies do it at the nail salon, but I did some research, and this provides a good base for your polish. If you have any oils on your nails, the polish will not be able to stick to your nails (even with a base coat on). Now, onto the next step.

First, apply your base coat, if you use one. My current favorites are Sally Hansen's Diamond Strength Hardener and Essie's Grow Stronger. I use them both. First I apply Diamond Strength (this stops my nails from breaking better than the latter) and then Grow Stronger (I find that this provides a better base for my polish). 

Next, apply your base color. This should be a nude, pinkish, or beigeish color. I personally like Essie Ballet Slippers. It's a very light nude pink. I apply one coat and that gives me the color I like. You can do one or two, whichever gives you the color and opacity you prefer.

Now, this step is SUPER SUPER IMPORTANT. Wait for your base color to dry for as long as you can before moving on to the next step. Your target goal is 30 minutes. Your nail polish should be completely dry to the touch, and dry enough that you can run your fingers over it without a smudge. Be patient. Please, I cannot stress enough that you must wait until your polish is completely dry. Again, wait AT LEAST 30 minutes.

Okay, now that I've drilled that into your heads, let's move on. Take a reinforcement sticker and stick it to your palm a few times to remove some of the stickiness so it doesn't damage the polish on your nail. Once you do that, press the sticker down firmly on your nail, leaving the tip showing. Make sure that the sticker is pressed down all the way, with no little lifts in the sticker. This is why I recommend using a colored sticker, so you can see that it's pressed down all the way and also so you can see what your tip will look like. You can choose to just leave a little space at the tip, or a little more, whatever you prefer. I left a medium amount. This is what it should look like: 

Note: This is just an image I put together of a picture of my nail (from a past tutorial) combined with a picture of a reinforcement label. It's still what it should look like. :)
Once you stick it down firmly, take your white polish (I used Spoiled Correction Tape, but any white polish will do) and paint the section that the sticker has blocked off at the tip. As you can now see, the sticker is there as a sort of barrier to protect your nail from getting polish all over it. For this reason, it's okay if you get polish on the sticker, just be careful not to get any in the hole in the center of the sticker where your nail is also showing. So again, using your white polish, paint the tip of your nail that is exposed, the non-cuticle edge, obviously. Once you paint that and it's virtually opaque, wait three seconds and then peel the sticker off. When I see instructions on various websites saying to wait until the polish fully dries and then peel the reinforcement off, I cringe. Doing this will make it harder to peel off the sticker, and you will most likely lose your clean edge and have a ridge in the polish. So peel the sticker off carefully after three seconds. You will be left with a perfect white tip! 

Let this completely dry, and then apply your glossy topcoat. What I do first, however, is apply a very sheer pink polish, such as Essie Mademoiselle. This adds a pretty rosier feel to the manicure, and tones down the stark white of the white polish, giving your nails a natural look. I also feel that it pulls the whole thing together. Then, after that has dried, I apply my topcoat. My new favorite is Essie Good to Go! It dries super fast, leaves an ultra-shiny finish, and prevents chipping! Yay!

So there you go! I am really happy with this manicure and I hope that it inspires you to create your own French manicure! (With this tutorial, of course. Ha ha!) Now, this is a traditional French. Experiment with different colored bases and tips, and try nail art too! Maybe search French manicure variations on Google, and that'll give you some inspiration. You can still use the technique I've shown you. Thanks for reading, and remember, sharing is caring, so share this blog with your friends! Ta ta!
........................................................................................................................
XOXO
Is